How to Grow Malabar Spinach in Pot | Malabar Spinach Care
Malabar spinach is a hot-weather alternative to spinach! Check out this post to learn how to grow Malabar spinach in the pot.
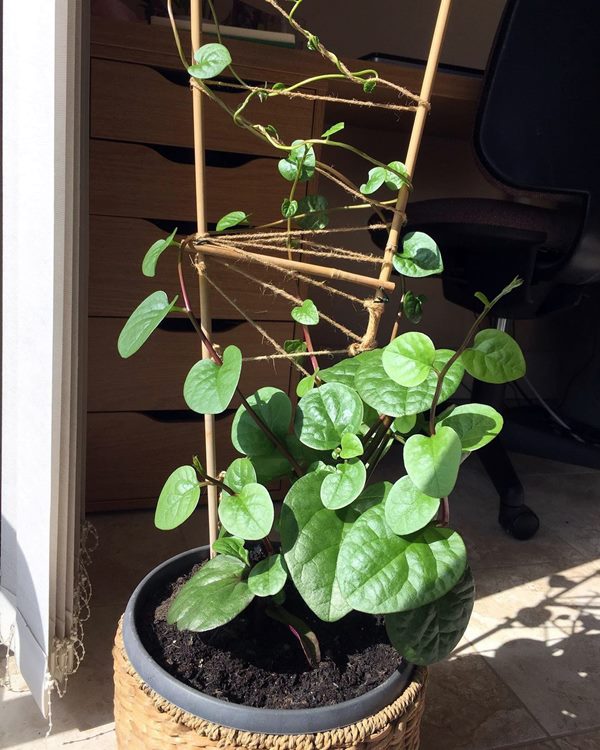
Botanical Name: Basella alba
USDA Zones: 7-11
Common Names: Ceylon spinach, Climbing spinach, Gui, Acelga trapadora, Bratana, Libato, Vine spinach, Malabar nightshade, Malabar spinach
Malabar Spinach is commonly found in India and is named after the Indian Southwestern coastal region Malabar. Belonging to the Basellaceae family, it resembles spinach in appearance and is an excellent warm-season substitute for spinach both in terms of flavor and nutrition. Being a tropical leafy green, it won’t bolt in summers, like spinach and can be consumed both raw and cooked. Growing Malabar spinach in the container is fun as it has minimal care requirements. So without further ado, let’s learn how to grow this warm-season vegetable in the pot!
How to Grow Malabar Spinach in Pot
Malabar spinach is a fast-growing leafy vegetable, so choose a large pot and provide sturdy support. Moist but well-draining soil and ample sunlight are essential for vigorous growth in the container. Soil amended with compost and aged manure aid in water retention. Seeds germinate in 10-20 days, and soaking them overnight will aid germination.
Propagating Malabar Spinach
Growing Malabar spinach is easy via seeds and cuttings, though propagation from cutting is faster. Get the seeds from a garden store or any online garden center!
Propagation from Seeds: Sow the seeds in seed starter trays indoors 6-8 weeks before the last spring frost date. In zone 7 and above, you can sow seeds outdoors a couple of weeks after the last frost.
- Sow the seeds 1/4 inch deep below the potting soil and lightly water.
- Space the seeds a couple of inches apart and locate the pot at a bright and warm spot.
- Seeds germinate in a couple of weeks, keeping the soil consistently moist.
- Thin the seedlings so that you have only healthy seedlings left in the pot.
- Transplant individual seedlings into new pots when they have 3-4 sets of true leaves.
NOTE: Malabar spinach is a vining plant, so it’ll need a support structure such as a trellis to grow.
Propagation from Cutting: It’s another easy way to propagate Malabar spinach that hardly takes time. Malabar spinach will be ready for harvest relatively faster if you grow it from cutting.
- Using sharp pair of scissors, take a 6 inches long cutting immediately below the node.
- Remove the bottom third of the leaves and plant the cutting in potting soil.
- Tap lightly at the base and fix a stake, so Malabar cutting remains upright.
- Soon roots will start to form, followed by new growth.
Congratulations, you have successfully propagated Malabar spinach from stem cutting.
Also Read: How to Grow Spinach in Pot
Choosing the Container
Start in a pot 5-6 inches in size or seed starter trays indoors. As Malabar spinach can quickly grow to 5-6 feet in the container, choose a large-sized pot that’s at least 12-16 inches deep for transplanting seedlings. Make sure the container has drainage holes at the bottom.
Choosing the Variety
Malabar spinach commonly comes in two types green Malabar spinach (Basella alba) and red Malabar spinach (Basella Rubra). Red Malabar spinach has pinkish veins running over foliage and purple to burgundy stems and is commonly grown as an ornamental plant. In comparison, green Malabar spinach is the preferred choice for culinary uses. Both have exact growing needs and care requirements.
Location
Hailing from the tropical region, it thrives in full sun but can also grow under partial shade. South-facing window, well-lit balcony, and patio are some good locations for placing Malabar spinach. You’ll be rewarded with a large leaf size in part shade.
Soil
Malabar spinach is not choosy regarding soil requirements and does well in almost every mix as long as it does not turn soggy. Ideally, you should go for loam-based soil that’s rich in organic matter. Add aged compost or manure to the potting mix to naturally increase nutrient availability and organic matter.
Watering
Water regularly and keep the soil consistently moist as it won’t tolerate dry soil. Bolting occurs due to dryness which makes the foliage bitter, so make sure the watering needs are fulfilled.
Temperature & Humidity
Being a tropical plant, it loves high temperature and humidity and won’t survive frost. Although it does well in temperatures above 80 degrees F, it’s above 90 degrees F when it shows vigorous growth. Anything below 60 degrees F affects its growth adversely.
Malabar Spinach Care in Container
Pruning
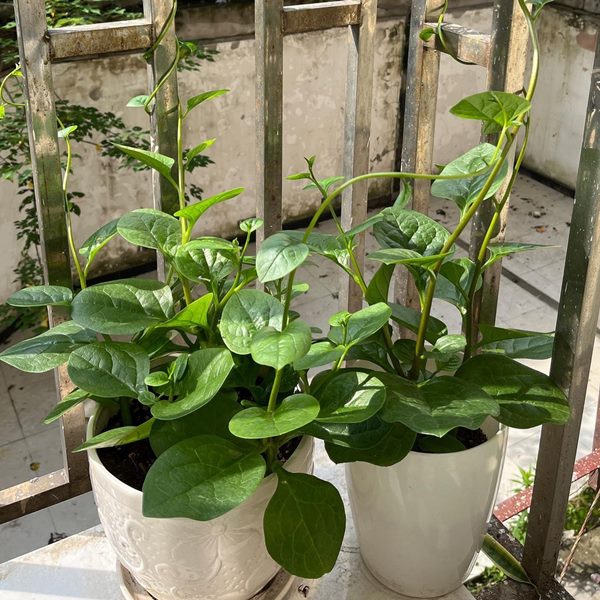
Pruning regularly is crucial as it keeps Malabar spinach from turning unmanageable and unruly. Also, if you lack space, pruning becomes even more critical to keep the size in check. Use shears to cut back from the tips to promote bushier growth.
Trellis
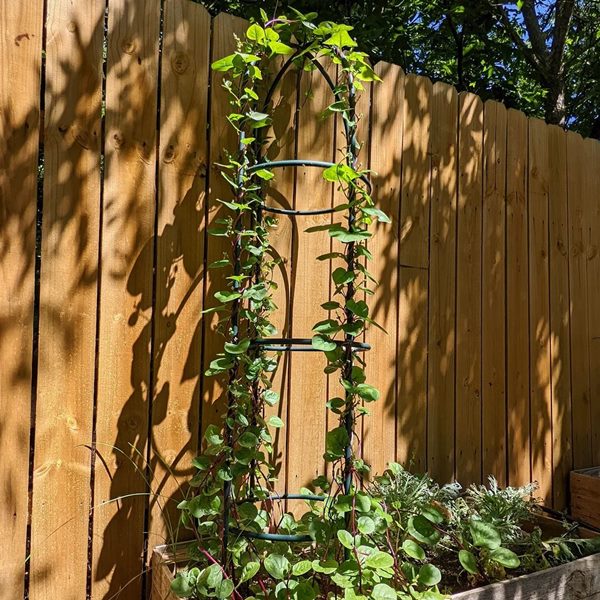
As Malabar spinach is a fast-growing climbing plant, make sure to provide a support structure such as a trellis. The support structure must be sturdy, or it won’t be able to handle this vining plant when it becomes mature.
Fertilizer
Leafy greens thrive on nitrogen-rich fertilizer, and Malabar spinach is no exception to this rule. Add a granular slow-release fertilizer to the soil when planting and fertilize again with a liquid fertilizer, diluted half to its strength twice a month during the growing season.
Harvesting
Malabar spinach is ready to harvest 70-85 days after planting. You can start harvesting the leaves early from sturdy stems. It responds well to heavy harvesting, which keeps the size contained and promotes bushier growth. Continue to harvest till it flowers in the fall!
TIP: Cut back the flowering buds to prolong the harvest period as once flowered leaves turn bitter.
Pests & Diseases
It’s hard to find pests on Malabar spinach, and even if you do, it’s easy to get rid of them by handpicking or spraying neem oil solution. As the soil needs to be consistently moist; it can lead to fungal problems such as Cercospora beticola. Grey spots with dark purple or brown ring over the foliage are the tell-tale sign of this fungal leaf spot disease. Discarding the affected leaves away from other plants is the only solution.
